

TL;DR:
- Core principles such as typography, colour theory, layout and hierarchy matter more than any tool. A repeatable workflow and daily practice on real projects build skill faster than tutorials alone. Understanding principles rather than software makes you adaptable, which becomes more valuable as AI tools spread.
Step by step graphic design is the process of creating visual content by following clear principles and stages to produce polished, professional work. Designers call this a design workflow, and getting good at it separates people who struggle from people whose work clients pay for. The fundamentals are typography, colour theory, layout and visual hierarchy. These four principles sit under every good design, from a social media post to a full brand identity. Reaching a job-ready level takes months of focused practice on them, not weeks, but anyone willing to follow a structured process and build real projects from day one can get there.
What foundational design principles should you master first?
Typography, colour theory, layout and hierarchy work in every piece of software. Learn them first and you are never tied to one tool. That adaptability is what makes a designer skilled rather than just software-literate.
Typography is the most underrated principle for beginners. Font choice, size, spacing and line height all affect how readable and trustworthy a design feels. A mismatched font pairing can make a professional brand look amateur instantly.
Colour theory shapes how your audience feels when they see your design. Warm colours like red and orange create urgency. Cool colours like blue and green build trust. Colour harmony, pairing colours that work together, is what separates polished designs from cluttered ones.
Layout and grids give your design structure. A grid divides the canvas into columns and rows so every element has a logical place. Designs built on grids feel balanced and intentional, even to viewers who cannot say why.
Visual hierarchy leads the eye from the most important element to the least. Size, contrast and placement all control it. Without hierarchy, viewers do not know where to look first and your message gets lost.
- Typography: use two fonts at most per project, one for headings and one for body text
- Colour theory: start with a three-colour palette of a dominant, an accent and a neutral tone
- Layout: use a 12-column grid as your default structure
- Visual hierarchy: make your main message at least twice the size of supporting text
Pro tip: Before you touch any software, sketch your layout on paper. Designers who sketch first spend less time revising on screen.
Which tools and preparation steps build a productive workflow?
Beginners often waste time hunting for the perfect tool instead of building a repeatable workflow. The tool matters far less than the process behind it. Pick one platform and stick with it for your first three months.

For complete beginners, browser-based platforms let you produce decent graphics within your first hour. For a professional career or client work, Adobe Creative Cloud (Photoshop, Illustrator, InDesign) is still the industry standard. Figma leads in UI and web design. Affinity Publisher and Affinity Designer are one-off purchase alternatives to Adobe for print and illustration.
Spend 20 to 30 minutes brainstorming and clarifying the project goal before you open any software. It cuts wasted effort, because it forces you to answer the questions behind every design decision. Who is the audience? What should they feel? What is the single most important message?
AI-assisted tools speed up repetitive tasks such as background removal, palette generation and layout suggestions. They do not replace creative judgement. Treat them as a capable assistant, not a substitute for your thinking.
| Goal | Recommended tool | Best for |
|---|---|---|
| First project, no experience | Browser-based platform | Social media graphics, simple layouts |
| Professional career path | Adobe Creative Cloud | Print, branding, photography |
| UI and web design | Figma | App interfaces, web mock-ups |
| Budget-conscious pro work | Affinity Designer/Publisher | Illustration, print design |
Pro tip: Organise your assets before you start: fonts in one folder, brand colours saved as swatches and reference images in a separate mood board file. You will spend far less time searching mid-project.
What are the essential steps to complete a design project?
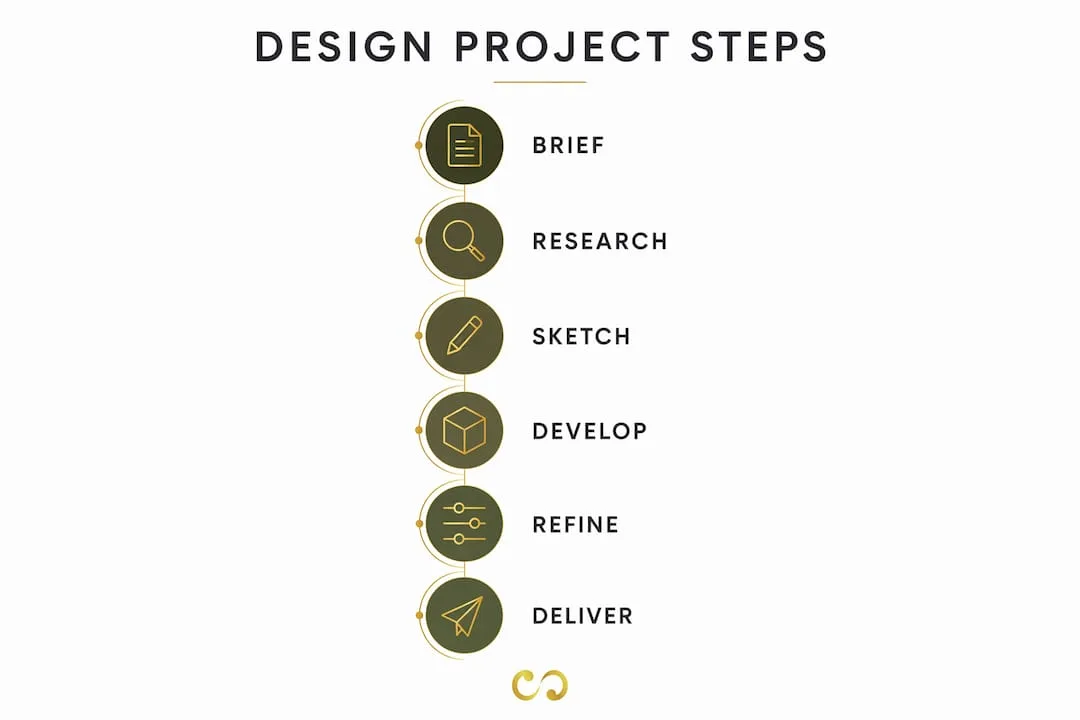
A repeatable process is what separates designers who finish projects from those who get stuck. The graphic design workflow guide below works for any project, from a logo to a full marketing campaign.
-
Understand the brief. Define the goal, audience, deliverable format and deadline before anything else. If you are working for a client, keep asking questions until you can sum up the goal in one sentence.
-
Research and gather inspiration. Study designs in the same category as your project. Look at what works and work out why. Behance and Dribbble show professional work in every category.
-
Sketch rough concepts. Put three to five rough ideas on paper before opening software. Sketching is quick and makes you think creatively without the distraction of menus.
-
Build the design on core principles. Set your grid, type hierarchy and colour palette before adding decoration. Structure always comes before style.
-
Review and iterate. Step away for at least 30 minutes, then look again with fresh eyes. Does the hierarchy work? Is the message clear at a glance? Make one round of revisions before asking anyone else.
-
Export correctly. Web graphics go out as PNG or JPEG at 72 DPI. Print files go out as PDF at 300 DPI or more, with bleed included. Wrong export settings are one of the most common and costly beginner mistakes.
| Stage | Key output | Common mistake |
|---|---|---|
| Brief | One-sentence project goal | Skipping it and guessing |
| Research | Mood board with 10 to 15 references | Copying instead of analysing |
| Sketch | 3 to 5 rough concepts | Going straight to software |
| Build | Draft design with grid applied | Ignoring hierarchy |
| Iterate | Revised design after self-review | Submitting the first draft |
| Export | Correct file format and resolution | Wrong DPI or missing bleed |
Pro tip: Always keep a working file (.ai, .psd, .fig) separate from your export. Clients nearly always ask for changes after delivery.
How can beginners speed up skill development and avoid pitfalls?
The quickest route to skill is the copy-to-learn method. Recreate designs you admire, exactly, in your own software. It forces you to work out how professional designers made their choices on spacing, colour and type, and it builds muscle memory faster than any tutorial.
Short daily practice builds skill faster than occasional long sessions. Fifteen focused minutes every day beats four hours once a week. Consistency trains your eye to see what works and what does not.
The most common beginner mistake is focusing on software features instead of creative principles. Knowing every Photoshop filter does not make you a designer. Understanding why a layout works does. Spend at least as much time studying design theory as you spend in software.
- Neglecting white space: Crowded designs look amateur. White space is breathing room that makes your key message stand out.
- Ignoring colour harmony: Random colour choices confuse viewers. Stick to your three-colour palette until you understand why it works.
- Skipping feedback: Show your work to someone else. Fresh eyes catch problems you have stopped seeing.
- Building a portfolio too late: Real projects, even self-initiated ones, build a portfolio faster than tutorials. Design a logo for a local business, a poster for a community event or a rebrand concept for a brand you admire.
Pro tip: Set yourself a weekly design challenge: one new project, one new principle applied. After 12 weeks you will have a portfolio and a skill set that tutorials alone cannot give you.
For founders applying these skills to their own brand, the visual branding process follows the same logic: principles first, tools second, consistency always.
Key takeaways
Getting good at graphic design means learning the core principles first, then applying them through a repeatable workflow on real projects.
| Point | Details |
|---|---|
| Principles before software | Typography, colour theory, layout and hierarchy work in every tool and should come first. |
| Preparation saves time | Spending 20 to 30 minutes clarifying goals before designing cuts wasted effort. |
| Follow a repeatable process | Brief, research, sketch, build, iterate and export, in that order, for every project. |
| Practise daily, not occasionally | Short daily sessions build skill faster than infrequent long ones. |
| Build real projects early | Self-initiated portfolio work teaches more than tutorials and proves your skill. |
Why I think most beginners learn graphic design backwards
Most graphic design tutorials start with software. Open this program, click this button, drag this slider. That produces people who can operate a tool but cannot design. I have seen it again and again: designers who know every Photoshop shortcut but cannot explain why their layout feels wrong.
The designers who grow fastest treat principles as fixed and tools as interchangeable. When you understand visual hierarchy, you can design in any software. When you only know one program, you are stuck the moment a client uses something else.
AI tools have changed what is possible in a short time. Background removal, palette generation and layout suggestions that used to take hours now take minutes. But AI speeds up the work of someone who already understands design. It amplifies good judgement. It does not create it.
The most important change of mindset is moving from perfectionism to iteration. Your first draft is meant to be rough. Its job is to give you something to react to, not something to publish. Designers who accept that improve faster because they spend less time frozen and more time making.
Building a portfolio with real projects, even self-assigned ones, is the best investment a beginner can make. Tutorials teach you what to do. Real projects teach you what to do when things go wrong.
Pawan
Professional design support for entrepreneurs and aspiring designers
Learning the design process yourself builds real skill. At some point, though, your brand needs work that reflects where you are going, not where you started.
LOOM Brand Designs works with founders and growing businesses to create brand identities and graphics that look credible from the first impression. From a complete branding package to full graphic design services, every project rests on the principles in this guide: clear hierarchy, intentional colour and layouts that work. If you want to see what professional execution looks like, browse our portfolio or book a consultation to talk about your project.
FAQ
How long does it take to learn graphic design from scratch?
Expect months of consistent practice rather than weeks. Progress comes fastest when you focus on typography, colour theory, layout and visual hierarchy and apply them to real projects.
What is the best software for graphic design beginners?
Browser-based platforms let beginners produce decent graphics within their first hour. Adobe Creative Cloud is the industry standard for anyone pursuing a professional career.
What are the most important graphic design principles?
Typography, colour theory, layout and visual hierarchy. They apply in every piece of software and every design category.
What is the copy-to-learn method in graphic design?
It means recreating professional designs you admire, exactly, to understand how experienced designers made their choices. It builds practical skill faster than theory alone.
How do I start a step by step logo design project?
Start by defining the brand's audience and core message, then sketch three to five rough concepts before opening software. Use a limited colour palette and no more than two fonts to keep the mark clean and scalable.
The Hashtag Loom