TL;DR:
- A structured graphic design workflow helps small businesses stay consistent, save time and strengthen their brand identity. Clear brand guidelines, batched tasks and templates let you produce on-brand work quickly across every channel. A regular review, and a sensible mix of DIY, AI and professional help, keeps quality high as you grow.
Running a small business means wearing a dozen hats at once, and graphic design often becomes the messiest one. You need a social post by tomorrow, a flyer by Friday, and somehow your brand colours keep shifting from one piece to the next. The result is wasted hours, inconsistent visuals and a brand that looks cobbled together. A structured graphic design workflow fixes this. It turns scattered effort into a repeatable system, so you spend less time on each piece and more on running the business.
Key takeaways
| Point | Details |
|---|---|
| Standardise with guidelines | Brand guidelines and templates save time and protect your brand's consistency. |
| Smart tools cut creation time | Platforms like Canva and Figma, set up with your brand kit, turn most everyday designs into a quick edit rather than a fresh build. |
| Follow a clear workflow | Move through discovery, concepting, feedback and asset delivery in defined steps to avoid confusion. |
| Balance DIY, AI and expert input | DIY for speed, AI for drafts and volume, professionals for complex or high-profile work. |
Why workflow matters: from chaos to consistency
Most entrepreneurs treat graphic design like a fire drill. A need pops up, they scramble to make something, and the results vary wildly. One week the Instagram post uses a bright teal. The next week it is navy. The logo gets stretched on a flyer because nobody saved the original file. These small inconsistencies quietly wear down the trust customers place in your brand.
The time cost is easy to see. The old way: you open a blank canvas, hunt for your logo file, try to remember your hex codes, pull in stock photos and rebuild the layout from scratch. The workflow way: you open a branded template, swap the copy and image, and export. Repeat that across every project in a month and the hours you get back add up quickly.
The foundation of any efficient workflow is a brand guideline document. Shopify describes brand guidelines as a "rulebook" for entrepreneurs, and that is exactly how they cut rework: every designer, contractor or team member knows which colours, fonts and logo versions to use. Pair that with real consistency and trust in your visual identity, and your brand starts to feel considered rather than patched together.
What a structured workflow gives you:
- Faster turnaround on every design project
- A consistent visual identity across all marketing channels
- Less rework, because expectations are clear upfront
- Easier onboarding for new team members or contractors
- Quicker sign-off from clients and stakeholders
| Without workflow | With workflow |
|---|---|
| Every project starts from a blank page | Projects start from a branded template |
| Inconsistent colours and fonts | Standardised brand kit |
| Scattered file storage | Organised asset library |
| Constant rework and revisions | A clear brief reduces revisions |
| Hard to delegate tasks | Templates make delegation easy |
A structured branding process guide is not a luxury for large agencies. It is an advantage for small businesses that need to move fast without dropping quality.
What you need: tools, templates and prerequisites
Before you build your workflow, get the ingredients ready. You would not start a recipe without your tools laid out, and the same logic applies here.
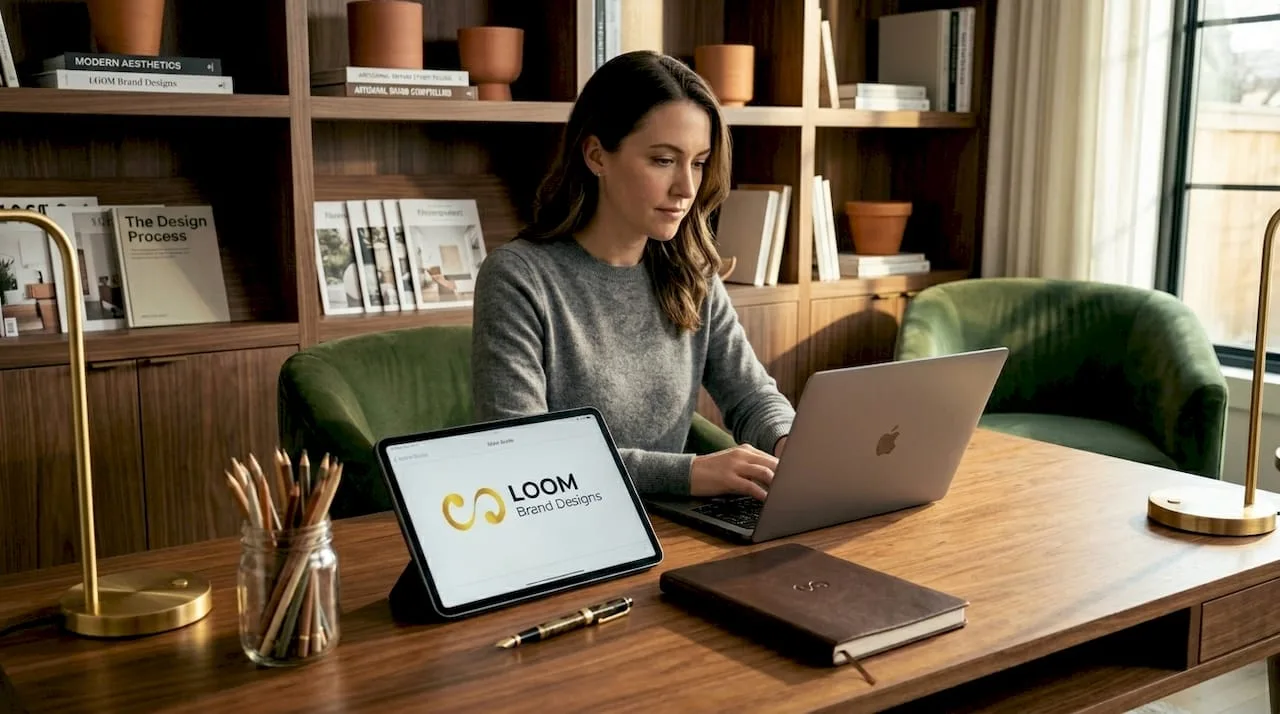
Tools like Canva, Figma and reusable libraries speed up design for entrepreneurs at every skill level. Each has a different strength, and the right choice depends on your team size, technical comfort and project complexity.
| Tool | Best for | Pros | Cons |
|---|---|---|---|
| Canva | Social media, marketing collateral | Beginner friendly, huge template library | Limited advanced features |
| Figma | Web and app design, team collaboration | Real-time collaboration, design systems | Steeper learning curve |
| Adobe Express | Quick branded content | Strong brand kit features, Adobe integration | Subscription cost |
| Miro | Wireframing and project planning | Great for brainstorming and mapping flows | Not a full design tool |
Beyond the tools, you need a set of core brand assets ready before you start any project. Think of it as your design pantry.
Essential assets to prepare:
- High-resolution logo files in several formats (SVG, PNG, EPS)
- Your exact brand colour hex codes (and CMYK values for print)
- Approved font files or links to web font licences
- A brand guideline document (even a simple one-pager works)
- A shared folder or cloud library for team access
- A library of approved stock photos or illustrations that suit your brand
Batching is another useful habit. Instead of designing one social post at a time, set aside a couple of hours and create a month of content in one sitting. You stay in the design mindset, the templates are already open, and you get far more done per hour. This approach to graphic design engagement keeps your marketing consistent even in your busiest weeks.
Pro Tip: Store your brand assets in a shared cloud folder (Google Drive or Dropbox) and link to it from your design tool's brand kit. That one step ends the "I can't find the logo" problem.
For more on building a visual identity that holds together across every touchpoint, these branding tips for entrepreneurs are worth bookmarking before you move on.
The essential graphic design workflow: step by step for small business
A professional workflow is not complicated. It is just disciplined. This sequence works for everything from a social graphic to a full brand refresh.
Figma's guide to standard workflow stages covers discovery and the creative brief, wireframing, design concepts, refinements, asset creation in multiple formats, and developer or platform handoff. Here is how to make each one practical.
Step 1: Write a creative brief. Before any pixel is placed, answer these questions: what is the goal of this design? Who is the audience? Which platforms will it live on? What is the deadline? A two-paragraph brief prevents round after round of revisions. Use it as your anchor throughout the project.
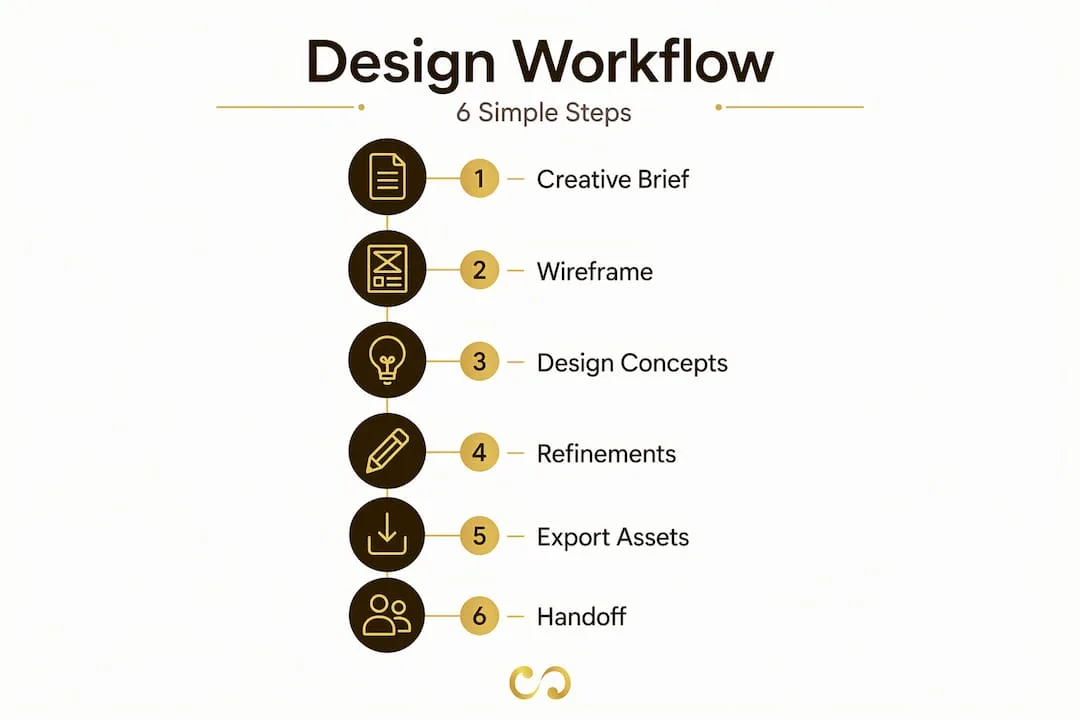
Step 2: Sketch wireframes or rough layouts. This does not need to be digital. A napkin sketch of "headline here, image right, button below" takes three minutes and agrees the direction before real design work begins.
Step 3: Develop two or three design concepts. Do not fall in love with your first idea. Build two or three rough versions with different visual treatments. This gives stakeholders a real choice and often surfaces a better direction than you expected.
Step 4: Collect feedback using the 10/50/99 rule. Show work at 10% complete for directional input, 50% for structural feedback and 99% for a final polish review. This stops you getting detailed copy edits on a layout that is about to change completely. It is one of the most underused habits in creative project management.
"Getting feedback at the right stage is more valuable than getting feedback frequently. Misaligned reviews waste more time than no reviews at all."
Step 5: Export finished assets in every format you need. Every project should end with a complete export package. Web needs compressed PNGs or SVGs. Print needs high-resolution PDFs. Each social platform has its own size requirements. A simple export checklist stops anything falling through the cracks.
Step 6: Hand off to the developer or platform. If the design is heading to a website or app, document every spec: font sizes, spacing values, button states and colour codes. If it is going to a printer, include bleed marks and embed all fonts.
| Project type | Key export formats | Handoff notes |
|---|---|---|
| Social media | PNG, MP4 | Include size variants for each platform |
| Print materials | PDF (CMYK, 300dpi) | Add bleed and crop marks |
| Website assets | SVG, WebP, PNG | Include 1x and 2x versions |
| Presentations | PDF, PPTX | Embed fonts or convert to outlines |
This workflow pairs naturally with a broader content marketing workflow, so your visual output always supports your content calendar. When you design marketing materials this way, projects move from idea to published asset with far less friction.
Troubleshooting and expert tips: what the pros do differently
Even a solid workflow hits snags. Here is where most small business workflows fall apart, and how to prevent it.
Scope creep is the silent killer of design timelines. It starts innocently: "Can we just add one more version?" or "Can you make it work for print too?" A creative brief with clearly defined deliverables is your best defence. Anything outside the brief is a new project request, not a revision.
Miro's guide to design handoff covers the details professionals do not skip: documenting design states such as loading, error and empty states, planning for responsive breakpoints, and running accessibility checks before any asset goes live. Many entrepreneurs miss these steps, then wonder why the website graphic looks broken on mobile.
Practical tips:
- Test every digital graphic on desktop and mobile before publishing
- Run a colour contrast check for accessibility (WCAG asks for a 4.5:1 contrast ratio for body text)
- Name files consistently: "BrandName_AssetType_Size_Date" saves hours of hunting later
- Version your files so you can roll back when a client changes their mind
- Add a "do not use" section to your brand guidelines to prevent logo stretching, colour substitution or font mixing
Pro Tip: Use the 10/50/99 feedback rule on every project, even solo ones. At 10%, ask yourself if you are solving the right problem. At 50%, check the structure works. At 99%, sweat the details.
"Accessibility is not a bonus feature. It is a baseline expectation. A design that cannot be read by someone with low vision is a design that is not working."
Understanding how smart graphic design drives business growth means recognising that these details separate businesses that look professional from businesses that look like they are still figuring it out. For a wider view, these digital marketing workflow tips connect your design process to the rest of your marketing.
Traditional, DIY and AI: choosing your approach
Not every business needs the same approach. Choose wrong and you waste money. Choose right and you get a design system you can keep up.
Traditional, strategy-first workflows and AI-accelerated design trade consistency against speed. Traditional workflows produce polished, brand-controlled results but take more time and usually professional skill. AI tools can produce usable visuals in seconds, but without clear brand guidelines the output can feel generic or off-brand.
| Approach | Speed | Cost | Brand control | Best for |
|---|---|---|---|---|
| Traditional (professional) | Slow | Higher | High | Rebrands, major launches |
| DIY with templates | Medium | Low | Medium | Ongoing social content |
| AI-assisted design | Fast | Low to medium | Variable | Drafts, ideation, scaling |
Where each one fits:
- Traditional professional workflow: a new brand identity, packaging, trade show materials, or anything that will represent your business for years
- DIY with templates: weekly social posts, email headers, event flyers and internal documents
- AI-assisted tools: rapid content creation, exploring visual directions, or repetitive tasks like ad variations
The risk with AI is consistency drift. Generate five images across five sessions without referencing your brand kit and each one will look subtly different. Put your brand guidelines into every AI prompt: "Use [hex colour], [font name], [tone adjective], targeting [audience]." That one habit keeps AI output on brand.
Pro Tip: Treat an AI-generated design the way you would treat a contractor's first draft. It gets you most of the way quickly. Then apply your brand standards to finish it properly.
Knowing when to call in a professional is a skill in itself. Read our guide to brand positioning for small business to judge when your visual identity needs more than a template can give.
The overlooked truth about design workflow for entrepreneurs
The tool you choose matters far less than the habit you build. We see entrepreneurs spend weeks comparing Canva, Figma and Adobe Express, then get so overwhelmed by the options that they never systemise anything. The best tool is the one you will actually use every time.
The entrepreneurs who gain most from workflow improvements are rarely the ones with the most sophisticated system. They built the simplest one and stuck with it. A checklist taped to the wall. A shared Google Drive folder with clearly named subfolders. Three branded templates used for every social post. That beats a complicated project management setup nobody opens.
The other thing most guides skip is the quarterly review. A workflow is not something you set and forget. Every three months, ask: where did projects get stuck? Which templates did we actually use? What took longer than expected? That habit is what turns a decent workflow into a good one.
Consistency is the real product of a good workflow. Not perfect designs, consistent ones. A brand that looks the same every week, on every platform, builds far more trust than one that occasionally produces something beautiful but usually looks scattered.
Ready to streamline your design workflow?
Building a graphic design workflow from scratch takes effort upfront, but the time you save and the stronger brand you get are worth it. If you would rather skip the trial and error, our team can help.
At LOOM Brand Designs, we work with entrepreneurs and small business owners to create design systems that hold together under real business pressure. Whether you are starting from zero or sharpening what you already have, explore our Basic Branding Package for a complete brand foundation. Browse our professional graphic design services to see what a workflow-driven approach looks like in practice, or look through our design portfolio to see what a clear process can deliver.
Frequently asked questions
How can small businesses keep graphic design consistent across all materials?
Use a brand guideline document and reusable templates so every design follows the same standards for colour, fonts and logo use. Treat your brand guidelines as the rulebook that governs every visual decision.
What's the fastest way to produce good graphics as a non-designer?
Use template platforms with pre-made layouts set up with your brand kit, and batch your tasks. That turns most everyday designs into a quick edit instead of a fresh build, without losing quality.
How do I make sure my graphics work across formats and platforms?
Export assets in several formats and sizes, and use brand kits so every file is ready for web, print and social media. Creating assets in formats such as SVG, PNG and PDF is a core step in any professional workflow.
What's the role of AI in graphic design workflows today?
AI tools can speed up design and cut costs, but using them without clear brand guidelines risks visual inconsistency across your marketing. Give them tight brand parameters to keep the output on brand.
When should I hire a professional designer instead of doing it myself?
DIY works well for simple, recurring content. Hire a professional for new branding, major product launches, or whenever your business needs polished, strategic visuals. DIY for the basics and professionals for the polish is a practical rule that saves both money and headaches.
The Hashtag Loom